Webcam is a necessary device that almost everyone needs. From the online class to the meeting with your team. Especially in the era of work from home becoming a common thing. To accommodate those online meetings, you need to have a proper webcam to have a pleasant experience with the online meeting.
But what if your webcam is broken, or maybe your webcam quality is not good enough, or even the webcam resolution is too low, making your video look like it came from the year 2000?
There are a few available applications that can utilize your Android camera and turn it into a webcam that you can use for any online video conference. One of the apps that you can use as a webcam is DroidCam.
In this article, You will learn how to install DroidCam on Ubuntu 22.04. Because with DroidCam can use your Android phone to use as a webcam online meeting. With the advanced cameras available in modern Android devices, the picture quality they produce is often better than most budget webcams.
What is DroidCam
Droidcam is an application built and developed by dev47apps that allows you to utilize your Android camera and use it as a webcam on your Computer.
The way the DroidCam works is by utilizing the camera on your Android phone and then transferring the camera data to the Droidcam client in your computer through the Wi-Fi network or USB cable.
When you use a video conferencing application like Zoom or Skype, it will automatically detect your DroidCam camera as a dedicated webcam and you can use it normally for video conferences.
Thanks to DroidCam, you no longer need to spend money buying a new webcam because now you can just use your Android phone as a webcam. And the best part is, your Android camera will likely beat most of the budget webcams available out there.
Install DroidCam on Ubuntu 22.04
Installing DroidCam on Ubuntu 22.04 is quite straightforward, but it required some dependencies to ensure you can install DroidCam properly. But don’t worry, I will guide you carefully to make sure you can install DroidCam on your Ubuntu machine.
Install the Required Dependencies
First, you will need to install some dependencies that are required by DroidCam to make sure it can run properly without any problems.
To begin with, make sure your package repositories are updated with the latest versions. Follow the command below to update your package repositories:
sudo apt updateNext, you will need to install the linux-headers of your current active kernel. Additionally, you will need to install gcc and make package. To install all of them, run the following command:
sudo apt install linux-headers-$(uname -r) gcc makeAnd then, the next dependencies you need to install are the v4l2loopback modules. Just run this command, and they will be installed on your system.
sudo apt install v4l2loopback-dkms v4l2loopback-utilsNow all the required dependencies are already installed on your Ubuntu machine. With this, we can proceed to the next step, which is downloading the DroidCam package.
Download the DroidCam Package
We will download the DroidCam package through the command line.
Go to /tmp directory by using the cd command:
cd /tmpFrom the /tmp directory, you can download the DroidCam package using the wget command. To do so, simply run the following command:
wget -O droidcam_latest.zip https://files.dev47apps.net/linux/droidcam_2.0.0.zipThe download process should begin. just wait until the package is completely downloaded.

Once the download process is done, we can move to the next step, which is installing the DroidCam package on your Ubuntu 22.04 machine.
Don’t close your terminal yet because you will need it for the next step.
Extract and Run the DroidCam Installer Files
With the DroidCam package already downloaded, we now need to extract the package before proceeding to install it. To extract the package, use the unzip command:
unzip droidcam_latest.zip -d droidcambasically, it will extract the package and place them inside the droidcam directory.

Now navigate to the droidcam directory where the extracted files are located using the cd command:
cd droidcamInstall the DroidCam client by running the following command:
sudo ./install-client
Then install the video driver by simply executing the command below:
sudo ./install-videoJust wait until the video driver installation is complete.

Once it is complete, you can proceed to install the audio driver. This audio driver is an optional step, but if you want to use the microphone from your Android phone, you can install the audio driver by running the following command:
sudo ./install-audioNow everything is complete, and DroidCam is already installed on your Ubuntu 22.04 machine.
Download the DroidCam App on Your Android Phone
To use your Android phone as a webcam, you must first install DroidCam on your device.
Open your google play store app
In the search bar, type droidcam and hit the search button
You will find it at the top of the list.
Click install and the installation process should begin.
Once the installation is complete, you can open the app by using the green open button.
Run the DroidCam
Now that all the requirements are already installed, you can run the DroidCam client on your computer by launching it from the app menu.

After that, you also need to open the DroidCam app on your Android phone.

As you can see, there is an IP address displayed in the app. This IP address will be used for connection between your phone and your computer.
Copy that IP address and paste it into the DroidCam client on your computer. Then hit connect to establish the connection.

If everything works as expected, you should now be able to use your Android camera as a webcam.
Change the Connection Mode in DroidCam
There are two available options for the connection modes in DroidCam that you can use. The default one is a connection over a Wi-Fi network. The other mode is a connection through a USB cable. We will learn how to switch between those two options.
DroidCam Connection Using Wi-Fi
Connection through a Wi-Fi network is the default connection mode in DroidCam. Using this connection mode is very simple and straightforward actually.
Make sure your phone and computer are connected to the same Wi-Fi network.
First, open your DroidCam app on your phone. You will see the IP address listed in there.
Open the DroidCam client on your computer.
In the Phone IP field, type your phone IP address that is listed on your Android app.
Leave the DroidCam Port field as it is.
Click the Connect button to establish the connection.
DroidCam Connection Using USB Cable
The other mode of DroidCam connection is through a wired USB cable. With this type of connection, you won’t need to connect to the same Wi-Fi network, instead, you will need a USB cable.
First, you will need to have ADB installed on your computer, to do so run the command below:
sudo apt install adbAfter that, you will need to enable USB debugging on your Android phone. To enable USB debugging, you must first enable Developer Options.
To enable Developer Options, go to settings, scroll down to the bottom, go to About phone, and tap on the build number seven times. This will enable Developer Options.
Now the Developer Options should be available on your Android settings. most of the time, it is listed at the very bottom of the settings, but it may be located in the Additional Settings section.
In the Developer Options, look for the USB debugging option and enable it.

Next, connect your phone to the computer using the USB cable. A prompt to allow USB debugging will appear. Tap OK or allow to establish the debugging connection.
Open the DroidCam app on your phone to get ready to use it as a webcam.
Then, open the droidcam client on your computer.
Change the option from WiFi/LAN to USB (Android).
Hit Connect to establish the connection.
Congratulations! You have successfully established a connection in USB mode. With this type of connection, you don’t need to worry about your phone running out of battery because it will simultaneously be charged.
Change the DroidCam Camera Resolution
The default resolution provided by DroidCam is just 640 x 480, which may not offer sufficient video quality for your conference needs. Therefore, it is recommended to change the resolution to a higher value for better video quality.
Changing the DroidCam resolution is very simple, you only need to edit the droidcam.conf file using your favorite text editor, this time we will use the nano text editor.
sudo nano /etc/modprobe.d/droidcam.confAs mentioned earlier, the default resolution is 640 x 480, so we will change it to a higher resolution, such as 1920 x 1080. Set the width value to 1920 and the height value to 1080. The configuration should appear as follows:

Save the file, press CTRL + O and then press CTRL + X to exit from the nano text editor.
Now when you launch the DroidCam again, it will have a resolution of 1920 x 1080, which is good enough for online video conferences.
Using DroidCam on Video Conferencing Applications
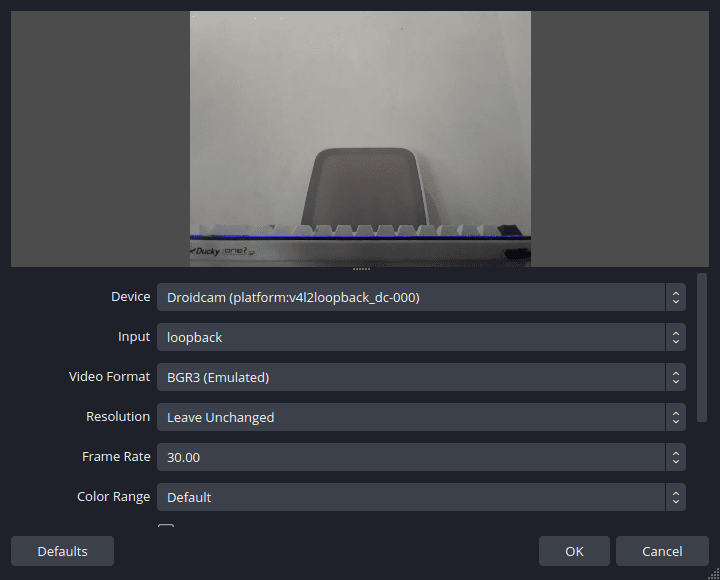
DroidCam can be used on various applications that require a webcam, such as Zoom, Discord, OBS, and more. However, in order to use the DroidCam camera, we may need to switch to it in the application settings.
Don’t worry, because most of the time the option to switch the webcam is available in the settings, So we can easily change that.
Using DroidCam on Zoom

To use the DroidCam camera on Zoom, follow these steps:
- First, launch the Zoom application and sign in to your Zoom account if you haven’t signed in yet.
- Go to settings by clicking the gear icon on the top right corner.
- Within the settings, navigate to the video settings section where you will find the option to select your camera.
- Change the camera option to DroidCam.
- And that’s it. Now you can start your Zoom call using your Android phone camera.
Using DroidCam on OBS
OBS is a popular screen recorder software, and besides that, it can also record the webcam too.
Using the DroidCam camera with OBS is quite simple.
- First, open the OBS application
- In the dashboard, click the + (plus) button under the
Sourcessection. - Choose
Video Capture Devicefrom the options. - Name the device you just created, for this tutorial, let’s name it droidcam and then click OK.
- After that, select the device you want to use for this source. In this case, choose the droidcam camera, then click OK again.
- Now you should be able to see the video input from your DroidCam camera in OBS.
Using DroidCam on Discord

To use DroidCam on Discord is also pretty simple.
- First, you have to install Discord on your Linux machine.
- Once you have Discord installed, open the Discord application and log in with your Discord account.
- Look for the gear button at the bottom left of the screen next to your Discord username. Click it to access the settings menu.
- Click on the
Voice & Videosection. There you should see the option for the camera device. - Change the camera option to Droidcam.
- After that, you can test the camera by clicking the
Test Videobutton. - If everything is working properly, you should be able to see the video input from the DroidCam camera.
Uninstall DroidCam on Ubuntu 22.04
If somehow you no longer need DroidCam because you already bought a new webcam or something else, you can uninstall DroidCam from your Linux machine by executing the command below:
sudo /opt/droidcam-uninstallAfter running this command, the DroidCam should be uninstalled already from your device.
Conclusion
In conclusion, Droidcam is a useful software that can utilize your spare Android phone as a webcam on your Ubuntu machine. You can use it for any application that required a webcam such as Zoom, Discord, OBS, or any other video conferencing applications.
By following this tutorial you should be able to install droidcam on your Ubuntu 22.04 and start using your Android phone as a webcam for video conferences.