Gnome is a highly popular Linux desktop manager that offers a fast and smooth working experience as a desktop environment. Many Linux distributions actually come pre-installed with the Gnome desktop environment.
Designed to be efficient for multitasking, Gnome has multiple workspace features, making it a very enjoyable space to work on your projects. It becomes even better when you have multiple monitors, which you can utilize to work on different tasks at the same time.
In this article, we will learn more about things that are important for the workspace of the Gnome desktop environment, specifically how to configure multiple monitors on Gnome desktop. It’s very important to have your multiple monitors set up properly.
Benefits of Multiple Monitors on Gnome Desktop
Gnome Desktop provides excellent support for multiple displays, extending your workspace and significantly improving your productivity. With Gnome, multiple displays are very well supported, and it even provides features to take full advantage of the extended displays.
Some other advantages of having multiple monitors on Gnome are:
- Easier Multitasking
- Multiple workspaces on all displays
- Fullscreen application
- No more dependant on ALT + TAB
With these advantages and an easy-to-use workspace, having multiple monitors is highly recommended if you are using Gnome. Although Gnome can perform well with just a single display, adding an additional display definitely enhances your overall experience while working with Gnome.
Configuring Multiple Monitors on Gnome Desktop
Of course, before you can enjoy the great experience with multiple monitors on Gnome, you will need to properly configure them first.
Although it’s not really complicated, it’s important for you to set up correctly so you don’t mess up the settings.
Requirements
Before proceeding to configure multiple monitors on gnome, make sure to prepare the necessary requirements:
- Your additional monitors
- HDMI / Display port cable
If you have all the requirements ready, we can proceed to the first step, which is connecting the monitor to your computer.
Connecting the Monitors
This step is relatively straightforward, and many of you should be able to do it on your own. If you’re already familiar with this process, feel free to skip to the next section. To connect the monitor properly, simply follow the steps below:
- First, plug the power adapter into the monitor to ensure it receives power.
- Then, connect your additional monitor to your computer or laptop using the HDMI or DisplayPort cable you prepared beforehand.
- If you’ve done it correctly, your additional monitor should now be displaying output from your computer or laptop. This means you can use the second monitor to expand your workspace.
Setting the Display Mode
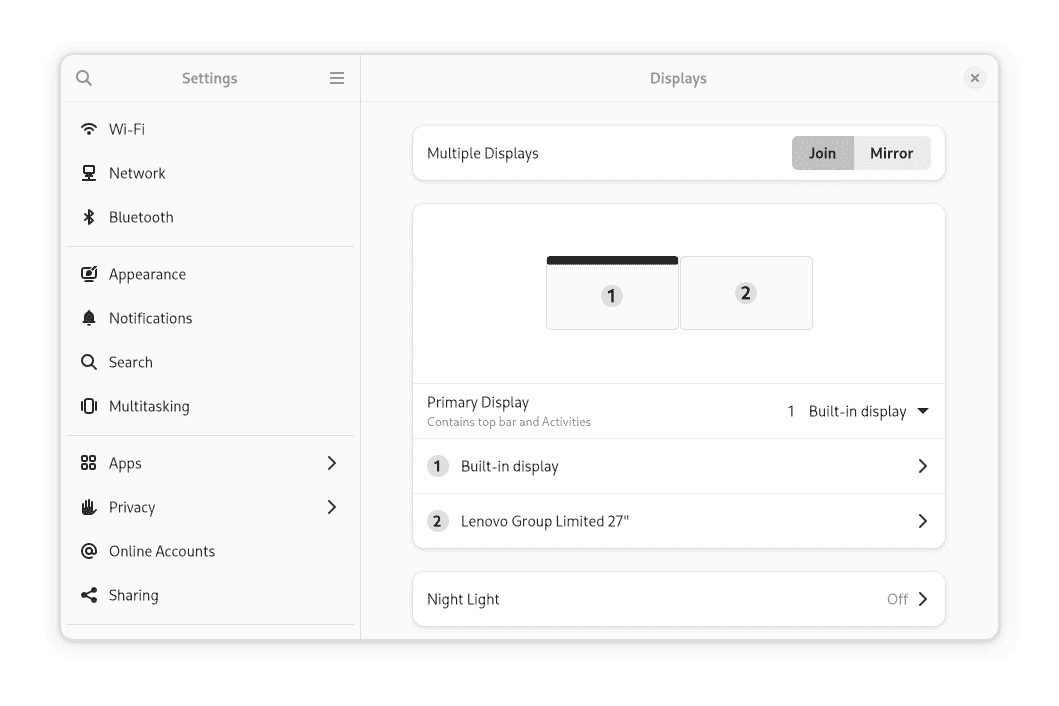
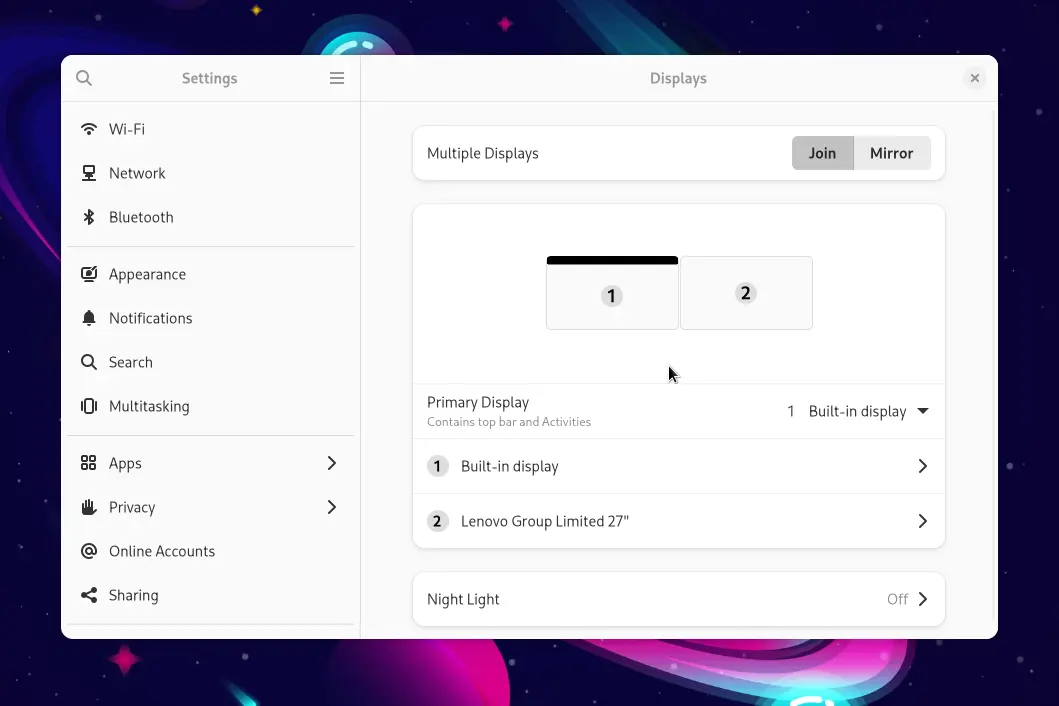
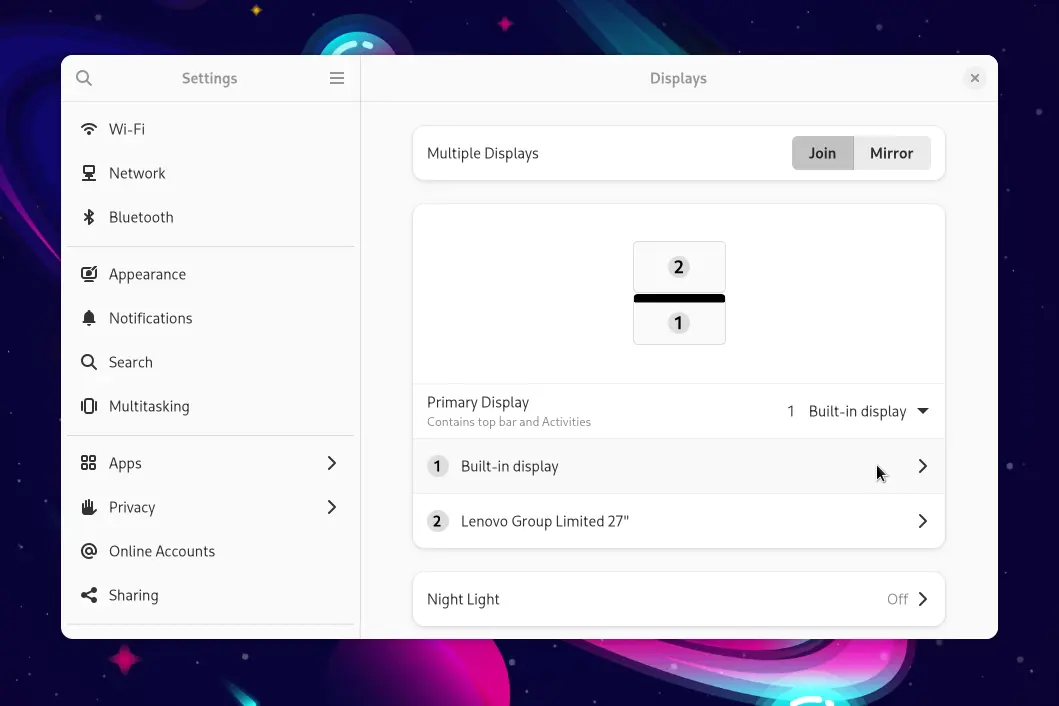
You can access the display mode settings by navigating to Settings > Displays > Multiple Displays.
There are two display modes available that you can choose from:
- Join Mode: In this mode, the additional monitor is set as an extended display, allowing for independent display spaces on each monitor.
- Mirror Mode: This mode mirrors the display from the first monitor to the second monitor, essentially showing the same content on both screens.
I recommend setting the display mode to Join Mode as it allows you to make the most of your screen real estate.
To do this, simply click the Join button and then click the Apply button located at the top right corner to confirm the changes.
A popup window will appear, asking if you want to “keep these display changes.” Choose Save Changes to save your settings.
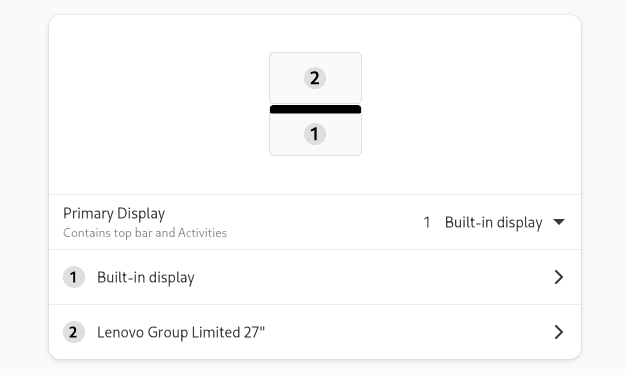
Arranging the Display Position
Now that your monitors have been connected, and the display mode is already set as join(extended). We can arrange the positioning of our monitors to match how the physical monitors are positioned.
For instance, if you positioned your monitors stacked, you can edit the positioning of the screen in the gnome display setting to match that configuration. This way, your mouse will move naturally between the monitors.
To arrange the positioning of your monitors, go to the display settings menu. You’ll see figures that represent your monitors, you can actually drag any of the available monitors to the desired position.
For example, here I move the second monitor from the right side to the upper side of monitor number one.
By dragging the monitor icon, you easily move it to any position you want.
And once you’ve done positioning the monitors, you can apply the changes by hitting the Apply button at the top right corner, and when the popup comes up, choose Save changes.
Selecting the Primary Display
When you have multiple displays connected, the system will assign one of them as the primary display. The primary display is where the main workspace elements, such as the dock, top bar, and notifications, are typically shown.
On the other hand, the non primary displays will be used mainly for extended workspace, so there are no dedicated dock or top bar for them.
However, you can easily change the primary display you want.

In the display settings menu, You can find the option for “Primary Display”, click on it and choose the display you want to set as the primary display. Then, click the Apply button to see the effect.
Once the changes are applied, the top bar and dock will immediately move to the new primary display you have selected.
Changing the Display Resolution
You can easily change the resolution of your monitor depending on your needs. You can either use the maximum resolution your monitor is capable of, or you can scale down the resolution to save more resources. But for me personally, I would choose the highest resolution if possible, because it will give me the most detailed display because of more pixel density.
To change the Screen resolution of your monitor you can easily do that from the Display settings menu, which is available in Settings > Displays. Here you will see a list of available monitors.
Click on the name of your monitor. In my case, I chose the Lenovo monitor. Once you click on the monitor’s name, you will see a list of available options. Click on the Resolution dropdown to choose from the available resolutions you can use.
After selecting the desired resolution, click the Apply button to implement your changes.
When a dialog box pops up asking if you want to “keep these display changes,” simply click on Save Changes. Your screen resolution should now be successfully updated.
Enabling Multiple Workspaces on All Displays
Multiple workspaces are a great feature, especially when you work with multiple tasks at the same time. Instead of stacking windows, you can assign each window to a separate workspace, creating a more organized work environment.
By default, the multiple workspaces feature is only available on the primary display. However, you can easily enable multiple workspaces on all displays.
- Open the Multitasking settings menu by navigating to Settings > Multitasking.
- Scroll down and find the Multi-Monitor section.
- By default, Workspaces on primary display only is selected. Change this option to Workspaces on all displays.
Now you can close the settings and when you press the windows button, you can see that all displays already have multiple workspaces.
Conclusion
And that’s it on how to configure multiple monitors on your gnome desktop. Properly setting up your monitors can improve your overall efficiency when using the gnome desktop environment.
If you have any trouble while following this tutorial, simply ask a question in the comment section below and I try to help you.